Introduction to Wool Dryer Balls
Wool dryer balls have surged in popularity as a sustainable, energy-efficient alternative to dryer sheets. Not only do they help your clothes dry faster, thereby saving electricity, but they also can reduce static and wrinkles, providing you with a natural and chemical-free option to soften your laundry. But did you know that you can easily make them at home? Let’s dive into the DIY world and explore how to create your own wool dryer balls.
Benefits of Using Wool Dryer Balls
Wool dryer balls offer a plethora of advantages over traditional dryer sheets. They are reusable, eco-friendly, and free from synthetic chemicals, making them safe for those with sensitive skin. Moreover, they can cut down drying time by creating space between clothes and allowing air to circulate more efficiently. Ready to make your own? Let’s gather our materials!
Materials Needed
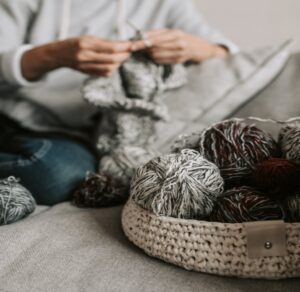
Choosing the Right Wool
Selecting the appropriate wool is pivotal for creating effective dryer balls. Opt for 100% wool yarn, ensuring it is not labeled “machine washable” or “superwash,” as these types will not felt properly. The wool should be able to shrink and mat together to form a solid ball.
Additional Tools and Materials
Apart from wool, you’ll need a pair of stockings or pantyhose, a pair of scissors, and some string or thread. Optionally, you may also want to have essential oils on hand to scent your dryer balls naturally.
Step-by-Step Guide to Making Wool Dryer Balls
Step 1: Preparing the Wool
Begin by winding the wool yarn into balls. Start with a small core and wrap the wool around it tightly until you have a ball approximately the size of a tennis ball. Make sure to tuck the ends in securely to prevent unraveling.
Step 2: Forming the Balls
Place each wool ball into a stocking, tying a knot or using string between each one to keep them separated. This will help them maintain their shape during the felting process.
Step 3: Felting Process
Wash the wool balls in the stockings on the hottest cycle in your washing machine, using a small amount of detergent. Then, transfer them to the dryer, drying on the highest heat setting. This process may need to be repeated several times until the wool balls are fully felted and will not unravel.
Step 4: Drying and Using
Once felted, remove the wool balls from the stockings and let them air dry completely. Optionally, add a few drops of your favorite essential oil to each ball for a natural fragrance. Your DIY wool dryer balls are now ready to be used!
Tips and Tricks
Ensuring Durability
To maximize the lifespan of your wool dryer balls, ensure they are fully felted before use and refresh them with new wool as needed. They should last for several hundred loads if cared for properly.
Customizing Your Dryer Balls
Feel free to get creative! Add a few drops of essential oils to your balls for a custom scent, or try needle felting designs onto them for a personalized touch.
Conclusion
Creating your own wool dryer balls is not only an eco-friendly choice but also a fun and practical DIY project. With just a few materials and a little time, you can create a reusable, natural alternative to conventional dryer sheets, saving energy and reducing waste in your laundry routine.
FAQs
- Can I use colored wool for making dryer balls?
- Yes, but ensure the dye is colorfast to prevent bleeding onto laundry.
- How often do I need to replace wool dryer balls?
- Typically, they last for 1000+ loads but refresh them with new wool if they begin to lose effectiveness.
- Can I use wool dryer balls with any laundry?
- Absolutely! They are safe for all types of laundry, just ensure to use them properly to avoid issues with tangling.
- How many wool dryer balls should I use per load?
- Generally, using 3-6 balls per load is effective, depending on the load size.
- Can I add fragrance to my wool dryer balls?
- Yes! Add a few drops of your favorite essential oil to each ball for a natural, pleasant scent.